In product development, we quickly see how vital plastic prototyping is for industries ranging from medical devices to consumer electronics and even robotics. It’s not just about bringing an idea to life; it’s about doing it smartly, saving money, and making sure it works.
Prototyping allows teams to spot design issues early, potentially saving them from costly mistakes when it’s time to ramp up production.
With today’s rapid prototyping technologies, creating and refining product iterations has become faster than ever. This speed is crucial for tweaking designs to perfection, impressing investors, and getting a real sense of how your product will perform in the market.
In this article, we’ll focus on exploring plastic prototyping, highlighting the methods, materials, and strategies that can help turn your concepts into realities without breaking the bank.
What Is Plastic Prototyping?
 Plastic prototyping is an innovative process that manufactures preliminary models of parts or products to validate designs, test functions, and gather user feedback. It encompasses various stages, from conceptual models and functional prototypes to pre-production versions, employing technologies such as 3D printing, CNC machining, vacuum casting, and injection molding.
Each method offers a unique balance of speed, cost, accuracy, and material options. Prototypes might focus solely on aesthetic and tactile qualities or might closely emulate the final product’s mechanical and material characteristics.
High-resolution prototypes, for instance, provide near-production quality ideal for detailed evaluations and stakeholder presentations.
By facilitating multiple iterations, plastic prototyping helps perfect the ergonomics, integrity, and appeal of a product, ensuring any design and functionality issues are resolved well before entering the costly phases of production tooling.
When Should You Create a Plastic Prototype?
Creating a plastic prototype is particularly advantageous at various stages of product development—during early concept validation, throughout design refinement, and just before pre-production.
Prototypes are instrumental in verifying the feasibility of a design, ensuring changes don’t overly complicate the manufacturing process. They are invaluable for experimenting with new materials, assessing unexpected stress points, or scaling up production volumes.
Prototyping is not just about physical iterations but also about aligning a project’s application, complexity, timeline, and budget to avoid potential pitfalls. W
ith rapid prototyping techniques, parts can be produced within days, or even hours, offering crucial feedback swiftly and efficiently, which is particularly beneficial when quick decisions or investor feedback are needed.
What are the Different Types of Plastic Prototypes?
In plastic prototyping, various models cater to specific stages of the product development process, each serving a distinct purpose.
- Concept models, or “looks-like” prototypes, are crafted to help visualize the shape, size, and aesthetic of a product. These models are generally produced quickly and cost-effectively, focusing less on material properties and more on design.
- Functional prototypes, or “works-like” prototypes, are developed to test the fit, mechanics, and performance of a product. These prototypes often require materials that are close to the final product specifications to accurately simulate mechanical properties and user interactions. Technologies like CNC machining and injection molding are commonly utilized here to achieve high fidelity in functional testing.
- High-resolution or pre-production prototypes represent the pinnacle of plastic prototyping, closely mirroring the final product in terms of tolerances, surface finish, and material characteristics. These prototypes are essential during the final testing stages, including Engineering Validation Testing (EVT), Design Validation Testing (DVT), and Production Validation Testing (PVT). They are crucial for stakeholders’ pitches and advanced testing scenarios, where a near-exact representation of the end product is required.
Each type of prototype—from simple visual models made through rapid prototyping techniques like 3D printing to complex, functional prototypes developed through selective laser sintering (SLS) or fused deposition modeling (FDM)—plays a critical role in the iterative process of product development.
What are the Steps to Create a Plastic Prototype?
The creation of a plastic prototype is a meticulous process that involves several critical steps, each designed to ensure the prototype meets all specified requirements before proceeding to mass production.
The first step in this process is to create a concept or design. This phase involves brainstorming, sketching, and digital modeling to flesh out the initial idea, ensuring it is feasible and functional.
Following the conceptualization, the next step is to develop a virtual prototype using CAD (Computer-Aided Design) software. This stage allows designers and engineers to refine shapes, dimensions, and mechanical elements, and to simulate assembly and part compatibility using advanced design software and prototyping technologies. It’s a crucial step for ironing out any potential issues in the design before it’s physically produced.
The final step involves building the physical prototype or mold. This could be done through various methods such as 3D printing, CNC machining, or injection molding, depending on the prototype’s requirements.
This stage may involve multiple iterations, where each prototype is tested and refined based on feedback and testing results.
Preparations for Plastic Prototyping
Before diving into the creation of a plastic prototype, several crucial preparatory steps must be taken to ensure the success of the prototyping process.
It is essential to define clear design objectives early on, such as the final part’s function, target production volumes, and cost constraints. This clarity helps steer the project in the right direction from the outset.
Engaging with engineering teams to verify the feasibility of the design is vital, especially when the prototype is intended for complex production processes like injection molding.
These professionals utilize their expertise to foresee potential challenges and adapt the design to meet real-world manufacturing requirements.
Utilizing the appropriate CAD software is paramount in establishing thorough design requirements. Engineers and designers rely on these tools to meticulously plan out mechanical strength, temperature resistance, and dimensional tolerances.
This software aids in creating detailed models that can undergo rigorous testing and refinement before a physical prototype is ever produced.
Material selection is another critical factor that should be considered early in the planning stage.
The choice of materials affects not only the cost and duration of the prototyping process but also the functionality and feasibility of the final product.
Different plastics and composites have unique properties that make them suitable for various manufacturing methods, such as CNC machining, 3D printing, or vacuum casting.
Furthermore, many production partners and service providers offer Design for Manufacturing (DFM) analysis, a crucial evaluation that helps identify design flaws that could make manufacturing difficult or overly expensive. This analysis can lead to significant cost savings and efficiency improvements.
What are the Common Plastic Prototyping Methods?
The different methods for creating plastic prototypes vary widely, each characterized by distinct advantages in terms of speed, cost, required volume, and material compatibility.
Here’s a breakdown of the most innovative and effective methods:
- 3D Printing: Suitable for producing 1 to 50 units, 3D printing offers a quick turnaround time, ranging from hours to days, and comes with moderate unit costs. This method is renowned for its versatility in creating complex geometries with a variety of materials including ABS, Nylon, and Resin.
- CNC Machining: Ideal for quantities similar to 3D printing, CNC machining provides tighter tolerances and typically has a lead time of 3 to 7 days. It is preferred for its precision and ability to use production-grade materials.
- Vacuum Casting: Efficient for producing 5 to 100 units, vacuum casting has a lead time of about 1 to 2 weeks and tends to have a medium-to-high unit cost. This method is useful for producing high-quality prototypes that closely mimic the final product in terms of detail and texture.
- Injection Molding: Best suited for volumes of 100 units or more, injection molding offers the lowest per-piece cost once the initial tooling has been established, although it requires a lead time of 2 weeks or more.
3D Printing
3D printing, or additive manufacturing, is a revolutionary technology that “takes the front row” in plastic prototyping, enabling designers and engineers to create prototypes directly from digital files. The process encompasses several techniques, like Fused Deposition Modeling (FDM), Stereolithography (SLA), and Selective Laser Sintering (SLS), all of which are suitable for different prototyping needs:
Fused Deposition Modeling (FDM)
FDM is a cost-effective, versatile method for early-stage prototyping, offering a quick turnaround. It supports a wide range of materials, from PLA to ABS and TPE, suitable for various applications. However, the layer lines might be visible, which could require post-processing like sanding or vapor smoothing.
Stereolithography (SLA)
 SLA excels in producing high-resolution prototypes with smooth surfaces, ideal for applications requiring fine details such as medical devices and consumer goods. The method uses a laser to cure liquid resin in a layer-by-layer process, resulting in prototypes with excellent surface quality.
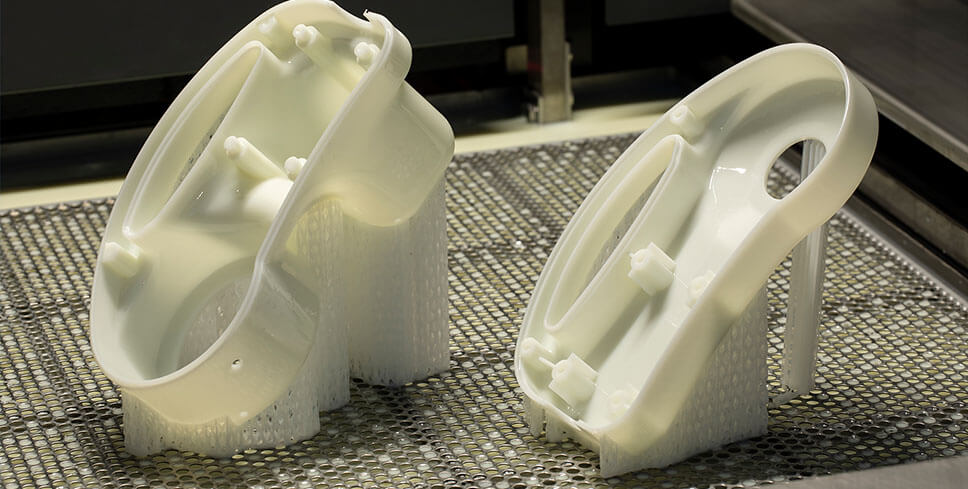
Selective Laser Sintering (SLS)
SLS is highly effective for creating durable, functional prototypes with robust mechanical properties. This technique uses a laser to sinter powdered materials, typically nylon, which is excellent for producing parts that require high stiffness and impact resistance, suitable for rigorous testing.
CNC Machining
Plastic CNC Machining stands out in plastic prototyping for its precision and ability to produce functional prototypes that closely mimic final products. This method is particularly suitable when prototypes require exact tolerances, or when the materials used must withstand real-world testing conditions similar to the end-use materials like ABS, PEEK, and Polycarbonate (PC).
CNC (Computer Numerical Control) machining involves subtracting material from a solid block using various cutting tools to shape the part. This technique is favored for its ability to produce parts with complex geometries and high precision.
CNC machining is ideal for functional testing where prototypes must endure the same stresses as the final product. It is also preferred when the aesthetic quality of the prototype is a priority, as it can achieve excellent surface finishes without the layering effects typical of many additive manufacturing processes.
The machines used in CNC machining range from simple 3-axis mills for basic shapes to advanced 5-axis and 7-axis machines capable of producing intricate and complex parts. These machines can handle various plastics and composite materials, offering flexibility in prototype development.
Benefits:
- High accuracy and consistency.
- Can use actual production materials, ensuring that the prototype’s mechanical properties are close to the final product.
- Quick turnaround for mid-volume batches, typically suitable for producing 10-50 units.
Drawbacks:
- Higher cost compared to some rapid prototyping methods, especially for complex parts.
- The rigid nature of the process can limit the feasibility of producing prototypes with undercuts or internal features without complex and costly tooling setups.
- Longer setup time for each new prototype design, which can be a drawback in a fast-paced development cycle.
There are a wide range of plastics that 3ERP offers through our CNC machining service, including ABS, PC, PP, POM, PMMA (Acrylic), HDPE, Teflon, PEEK and many others.
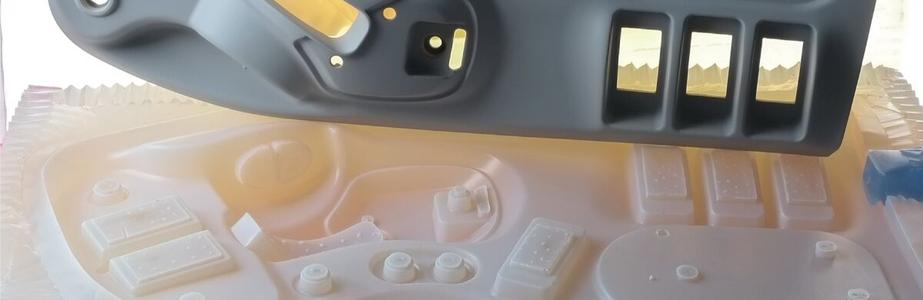
Vacuum Casting
Vacuum casting, often known as urethane casting, is a versatile and efficient prototyping method especially suited for producing high-quality plastic parts in small to medium quantities. This process uses a silicone mold, which is a cost-effective alternative to hard tooling, allowing for the creation of 20–25 duplicates before the mold requires replacement.
In vacuum casting, a master model is first created, typically via 3D printing or CNC machining. A silicone mold is then formed around this master.
Once set, the mold is cut open and the master removed, leaving a cavity that will form the cast parts. The casting material, usually a two-part polyurethane resin, is then mixed and poured into the mold, which is placed in a vacuum chamber. The vacuum removes air bubbles and ensures a dense, accurate casting.
Vacuum casting is ideal for prototyping when you need a series of parts that closely mimic injection-molded components. It is particularly effective for pre-market testing, user feedback sessions, and functional testing, providing a fast turnaround time and excellent surface detail.
The primary equipment used in vacuum casting includes a vacuum chamber, a silicone dispensing system, and curing ovens. These machines are critical for ensuring the precision and quality of the final prototypes.
Advantages:
- Cost-effective for small batch production.
- Ability to produce parts with varying degrees of hardness and in multiple colors or levels of transparency.
- Good for simulating over-molded parts.
Drawbacks:
- Limited life of silicone molds, with the need for frequent replacement impacting longer production runs.
- Generally offers slightly looser tolerances than CNC machining or injection molding.
- Longer lead times for larger quantities due to the individual processing of each batch.
Traditional Plastic Prototype Manufacturing Methods
Traditional plastic prototype manufacturing methods, while typically associated with large-scale production, can also be adapted to meet the needs of prototyping. These methods are invaluable when prototypes require the same materials and processes as the final product, ensuring that the prototype’s performance closely mirrors that of the manufactured item.
Extrusion
Extrusion is a manufacturing process used to create objects with a fixed cross-sectional profile. Plastic material is melted and pushed through a die to form long stretches of plastic parts with uniform cross-sections, such as tubes, rods, or profiles.
This method is particularly effective for producing high volumes of plastic parts with consistent shapes but is less commonly used for complex prototypes unless adaptations are made for smaller-scale projects.
The machines involved in extrusion include the extruder itself, featuring a hopper, a barrel, and a die. The plastic granules are fed into the hopper, melted in the barrel, and then forced through the die, shaping the molten plastic into the desired form.
Advantages:
- Cost-effective for long runs of products due to the continuous nature of the process.
- Capable of producing parts with consistent cross-sections efficiently.
Drawbacks:
- Limited to simpler shapes; complex cross-sections may not be feasible.
- Adaptation for prototyping can be less cost-effective due to the setup required for small runs.
Blow Molding
Blow molding is a manufacturing process by which hollow plastic parts are formed. It is primarily used for making products such as bottles or other hollow shapes. The process involves heating a plastic tube until it’s pliable, placing it into a mold cavity, and then using air pressure to expand the tube into the shape of the mold.
Blow molding is ideal for manufacturing hollow objects in high volumes, such as containers, bottles, and other similar items. It is particularly effective when prototypes need to mimic final products that will be blow molded.
Advantages:
- Efficient for producing large quantities of hollow objects.
- Can achieve thin walls and complex shapes.
Drawbacks:
- High tooling costs and setup times make it less ideal for prototyping unless similar production methods are needed for the final product.
- Limited to shapes that can be removed from a two-part mold without undercuts.
Rotational Molding
Rotational molding, also known as rotomolding, is a unique method used to create large hollow plastic parts, such as tanks and containers. The process involves loading plastic powder into a mold, which is then heated and slowly rotated along two axes. This rotation distributes the molten plastic evenly along the inner surfaces of the mold until it cools and solidifies into the desired shape.
This method is suitable when you need large, hollow products with uniform wall thicknesses. It is particularly advantageous for making items like kayaks, storage tanks, and playground equipment.
Rotational molding machines consist of an oven, cooling chamber, and molds that are mounted on arms that rotate the molds biaxially.
Advantages:
- Capable of producing very large, hollow parts with consistent wall thicknesses.
- Low levels of residual stresses due to the gentle rotational process.
Drawbacks:
- Cycle times can be long, making it less efficient for high-volume production.
- Limited to simpler shapes due to the rotational nature of the process.
Thermoforming
Thermoforming involves heating a plastic sheet until soft, then forming it over a mold by applying vacuum, pressure, or mechanical force. The plastic takes the mold’s shape, is cooled to harden, and then trimmed to create the final product.
It’s ideal for producing large panels, covers, and enclosures, particularly for appliances and medical devices. Thermoforming is also commonly used in packaging and automotive components.
Thermoforming machines typically consist of a heating element, a forming station where the mold and plastic sheet are brought together, and a trimming section.
Advantages:
- Rapid prototyping and tooling adjustments at a relatively low cost.
- Ability to produce large parts with fine details and textures.
Drawbacks:
- Generally limited to parts with relatively shallow depths.
- Higher material costs due to the excess trimmed off in the final stages.
Compression Molding
Compression molding is used to form thermoset plastics and composites. The process involves placing a heated plastic material in a heated mold, then closing the mold under pressure to shape the material into the desired form, where it cures and hardens.
Compression molding is best for creating high-strength, robust parts such as automotive components, electrical housings, and appliance parts. It is effective for medium to high-volume production.
Advantages:
- Produces strong, durable parts with high dimensional stability.
- Efficient for medium to high production runs due to fast cycle times once set up.
Drawbacks:
- High initial tooling costs.
- Limited to relatively simple part geometries due to the nature of the molding process.
How to Choose the Right Plastic Prototyping Method?
 Choosing the right plastic prototyping method hinges on several crucial factors. Each method presents unique benefits and constraints, making it essential to align your choice with the specific requirements of your project.
- Purpose of the Part: First, consider whether the prototype is intended primarily for aesthetic or functional testing. Methods like 3D printing or CNC machining are perfect for functional tests due to their accuracy and variety in material properties, while techniques like vacuum casting might be preferred for high-quality visual prototypes.
- Prototyping Cost: Budget constraints are critical. Some methods, like injection molding, entail significant initial investments for tooling, making them less ideal for low-volume runs unless cost per unit amortizes economically over large quantities. Conversely, 3D printing offers a more cost-effective solution for producing small numbers of parts.
- Quantity Needed: The number of prototypes required can greatly influence the method selection. For instance, 3D printing is efficient for one-offs and small batches, while injection molding suits large-scale production due to its ability to drive down per-unit costs at high volumes.
- Prototype Lead Time: Time constraints also play a decisive role. If rapid prototyping is necessary, methods like 3D printing or CNC machining can turn around parts within hours to days, much faster than vacuum casting or injection molding, which may require weeks.
- Complexity of the Part: The complexity of the design should also be considered. Additive manufacturing processes like SLA or SLS are better suited for intricate geometries which subtractive methods might struggle with due to tooling limitations.
- Additionally, it’s wise to bridge different prototyping methods as designs evolve. Starting with 3D-printed models to validate form and fit, you might move to vacuum casting for higher quality prototypes or small batches before finalizing designs for injection molding.
- Application Environment: Material choices should reflect the environment in which the part will operate, especially if subject to high temperatures or chemical exposure. This consideration ensures that prototypes accurately mimic the performance of the final product under actual working conditions.
What Materials Are Commonly Used in Plastic Prototyping?
The choice of material not only influences the prototyping technique but also impacts the final product’s functional and aesthetic qualities.
Here’s a guide to some of the most commonly used materials in plastic prototyping:
- ABS (Acrylonitrile Butadiene Styrene): Renowned for its toughness and impact resistance, ABS is a staple in both CNC machining and injection molding. It’s cost-effective and offers a good balance of mechanical properties.
- Polycarbonate (PC): Valued for its transparency and impact resistance, PC is often used in applications requiring visibility and durability, like in automotive and medical devices.
- Nylon: Known for its strength and durability, Nylon is particularly popular in selective laser sintering (SLS) for producing functional parts that require high resistance to wear and tear.
- Polypropylene (PP): Characterized by its fatigue resistance, PP is suitable for creating living hinges and flexible joints in prototypes.
- Acrylic (PMMA): Chosen for its optical clarity, Acrylic is frequently used in lighting applications and where a glass-like appearance is desired.
- PEEK (Polyether Ether Ketone): A high-performance plastic known for its excellent thermal and chemical resistance, suitable for demanding applications like aerospace and automotive.
- Urethane: Typically used in casting for prototypes that mimic the properties of injection-molded plastics, offering a variety of hardness and color options.
- Glass-filled or fiber-reinforced plastics: These are possible in CNC and injection molding, enhancing strength and thermal properties but are challenging to replicate accurately in 3D printing due to their composite nature.
For a detailed breakdown, the table below lists the top 12 plastics used in prototyping along with their suitability for various prototyping technologies, providing you with a comprehensive view to make an informed decision.
Top 12 Plastics Used for Prototyping and Their Suitability
| Material | Suitability for 3D Printing | Suitability for CNC Machining | Suitability for Injection Molding | Properties |
| ABS | High | High | High | Tough, impact-resistant, economical |
| Polycarbonate (PC) | Moderate | High | High | Transparent, high impact resistance |
| Nylon | High (especially for SLS) | High | High | Durable, strong, wear-resistant |
| Polypropylene (PP) | Low | Moderate | High | Fatigue resistant, flexible |
| Acrylic (PMMA) | Moderate | High | High | Optically clear, rigid |
| PEEK | Low | High | High | High-performance, thermal stability |
| Polyethylene (HDPE/LDPE) | Low | Moderate | High | Chemical resistant, tough |
| Polyurethane | High (for castings) | Low | Moderate (for cast urethane) | Versatile, available in various hardness |
| PETG | High | Moderate | Moderate | Good clarity, high strength |
| PLA | High | Low | Low | Biodegradable, good for initial prototypes |
| TPE/TPU | High | Low | Moderate | Flexible, rubber-like qualities |
| POM (Acetal) | Low | High | High | High stiffness, low friction |
Which Plastics Are Best for Creating Prototypes?
Selecting the right plastic for your prototype involves considering several factors:
- ABS: A standard choice for its excellent balance of strength, durability, and ease of machining. Suitable for both CNC machining and injection molding.
- Nylon (PA12): Best for SLS 3D printing, known for its durability and impact resistance, making it ideal for functional testing of mechanical components.
- PMMA (Acrylic): Opt for its clarity if transparency is crucial, while PC is preferred for its superior impact strength and resilience in challenging environments.
- PEEK: Optimal for high-performance prototypes that must withstand extreme temperatures and mechanical stress.
What are the Most Durable Materials for Plastic Prototypes?
Glass-filled Nylon and PC/ABS blends are excellent choices for enhanced strength and thermal stability. For scenarios requiring resistance to high temperatures and aggressive chemicals, PEEK is unmatched in performance, commonly utilized in aerospace, automotive, and healthcare applications.
Reinforced materials, such as carbon-filled composites, are increasingly popular in both 3D printing and CNC machining. These materials offer improved mechanical properties and durability but require specialized equipment. For injection molding, consider using fiber-reinforced plastics; however, be aware that these materials might demand specific tooling adjustments to handle the added abrasiveness of the fibers.
How to Design a Plastic Prototype?
Designing a plastic prototype involves meticulous planning and understanding of both the manufacturing process and the purpose of the prototype. Here are some crucial considerations:
- Wall Thickness: Ensure uniform wall thickness to avoid issues like warping or sink marks. Thicker walls can mean longer cooling times and potential deformities.
- Ribbing: Use ribs for added strength instead of increasing wall thickness, which helps maintain material volume and cooling uniformity.
- Draft Angles: Incorporate draft angles in your design to facilitate easy removal from molds, particularly in injection molding processes.
- Tolerance Requirements: Specify tighter tolerances for functional prototypes compared to more lenient tolerances for conceptual models.
- Stress Points: Identify potential stress points such as mounting holes or snap-fit connections and reinforce these areas appropriately.
- Accessibility for Post-Processing: Consider the ease of post-processing activities, like painting or sealing, and ensure that the design accommodates these processes.
- Support Structures in 3D Printing: Plan for necessary support structures to achieve complex designs without compromising on the structural integrity.
- Fillets and Radii: Use fillets or radii to smooth internal corners during CNC machining, which reduces stress concentrations and material failure.
- Clearance for Adhesives or Fasteners: Ensure adequate clearance for adhesives and fasteners or consider designing integrally molded snap-fits for ease of assembly.
- Surface Finishes: Choose appropriate surface finishes in the prototyping stage to approximate the final product’s look and feel, which can influence both aesthetic acceptance and functionality.
- Over-Engineering: Avoid over-designing the prototype; focus on essential features that meet functional requirements without unnecessarily complicating the part or increasing costs.
How to Optimize the Plastic Prototyping Process?
Optimizing the plastic prototyping process is crucial for efficiency and cost-effectiveness. Here are some strategies to enhance your prototyping workflow:
- Iterative Testing: Engage in iterative testing to make quick adjustments in the early design stages. This approach helps in refining the prototype based on real feedback before final production.
- Simplified Geometry for Initial Concepts: Start with scaled-down or simplified versions of the design to validate concepts without incurring high costs or extended timeframes.
- Hybrid Techniques: Combine additive and subtractive manufacturing processes when beneficial. For example, use 3D printing to create the basic shape and CNC machining to refine critical features, enhancing the prototype’s precision.
- Consistent Documentation: Maintain thorough design documentation, record all test results, and track every modification. This systematic tracking helps prevent confusion and ensures continuity throughout the prototyping stages.
- Budget and Lead Time Awareness: Keep a keen eye on the budget and project timeline. Select prototyping methods that align with your project’s deadlines and financial constraints.
Let’s look at some examples to give you a clearer picture;
- Iterative Testing: A consumer electronics firm used iterative prototyping to test and refine the ergonomics of a new remote control, making slight adjustments based on user feedback which significantly improved the final product’s usability.
- Hybrid Techniques: A custom automotive parts manufacturer combined 3D printing with CNC finishing to create highly accurate dashboard prototypes, which allowed them to present near-production-quality samples to clients for pre-production reviews.
Safety Tips During Creating Plastic Prototypes
Ensuring safety during the prototyping process is paramount. Here are essential safety tips:
- Personal Protective Equipment (PPE): Always wear appropriate PPE, including gloves and eye protection, when handling molten plastics and uncured resins.
- Proper Ventilation: Ensure your workspace is well-ventilated, especially when working with 3D printing resins or other materials that emit fumes.
- Handling Sharp Edges: Be cautious of sharp edges or corners on freshly machined parts; deburr and smooth edges as necessary to prevent injuries.
- Equipment Training: Undergo thorough training and adhere to operational manuals for all equipment, particularly for CNC machines and 3D printers.
- Chemical Safety: Handle solvents, cleaning agents, and support-removal fluids with care, and ensure they are stored and disposed of according to safety regulations.
What Are the Challenges During the Process of Creating Plastic Prototypes?
Creating plastic prototypes presents several challenges that can impact the success of a project. Here’s how to address some common issues:
- Material-Process Misalignment: Ensure the prototype materials closely mimic the final production materials to avoid performance discrepancies.
- Design Constraints: Acknowledge and design within the constraints of the intended manufacturing process to avoid costly late-stage redesigns.
- Complex Geometries: Manage complex designs by possibly combining multiple prototyping methods or including post-processing steps.
- Cost Management: Plan carefully when prototypes require high fidelity or large quantities to keep costs in control.
- Iterative Design: Incorporate feedback loops in your design process to adapt quickly to any new insights or constraints.
- Material Testing: Conduct thorough testing of materials under conditions similar to end-use to ensure they meet performance requirements before final production.
Which are the Best Machines to Create Plastic Prototypes?
 100vw, 1004px” data-lazy-src=”https://www.3erp.com/wp-content/uploads/2018/06/PMMA-CNC-Machining-Prototype-1.jpg” />When selecting the best machines for creating plastic prototypes, your choice should be guided by the required precision, material compatibility, and the size of the batch you need to produce.</p>
<ul>
<li><b>3D Printers</b>: Ideal for early proof-of-concept models, smaller benchtop 3D printers are great for low-cost and quick prototyping, while industrial-grade printers can handle more complex and larger volume tasks with a variety of materials.</li>
<li><b>CNC Mills and Turning Centers</b>: These are perfect for creating highly precise and durable prototypes. CNC machines can handle a range of materials and intricate geometries.</li>
<li><b>Vacuum Casting Setups</b>: Excellent for creating small batches of high-quality prototypes that mimic the properties of injection-molded parts.</li>
<li><b>Injection Molding Machines</b>: Best suited for later stages of prototyping when the design has been largely finalized and higher quantities are needed. Rapid injection molding machines that use aluminum or soft tooling offer a cost-effective way to produce near-production quality parts.</li>
</ul>
<ul>
<li><b>5-Axis CNC Machines</b>: These can manage exceptionally complex geometries and are ideal for parts that require high precision.</li>
<li><b>Large Build-Volume 3D Printers</b>: Useful for producing big parts or multiple parts in one session, enhancing the prototyping efficiency.</li>
</ul>
<h3 id=) What Are the Criteria for Choosing Quality Equipment
What Are the Criteria for Choosing Quality Equipment
Choosing the right equipment for plastic prototyping involves several crucial criteria:
- Precision and Resolution: Essential for ensuring the prototype meets the design specifications. Look for machines that offer tight tolerances and high resolution.
- Material Compatibility: Ensure the machine can handle the specific plastics and composites you plan to use, considering factors like temperature capabilities and chemical resistance.
- Production Throughput and Speed: Evaluate if a single machine suffices or if multiple units are necessary to meet production timelines effectively.
- Reliability and Maintenance Support: Opt for machines known for durability and backed by excellent support to minimize downtime.
- Control Systems and Software Integration: Choose equipment with advanced control systems and compatible software for streamlined prototyping processes.
- Post-Processing Options: Machines with integrated post-processing capabilities, like polishing stations and cleaning baths, can significantly speed up the time from prototype to final part.
Future Trends in Plastic Prototyping
Plastic prototyping is evolving rapidly with several exciting advancements on the horizon. Additive manufacturing is at the forefront, pushing boundaries with increased print speeds and expanding material options, including advanced composites that offer superior surface quality and mechanical properties.
The integration of hybrid manufacturing techniques, where 3D printing is combined with traditional CNC finishing, is gaining traction. This approach allows for the precision of subtractive methods with the complexity and speed of additive manufacturing.
Automation in prototyping processes, particularly through robotic part handling and automated finishing, is set to streamline production workflows, reducing both costs and lead times significantly. Moreover, the industry is moving towards more sustainable practices, with a growing adoption of recyclable and environmentally friendly polymer formulations.
The emergence of multi-color and multi-material 3D printers is revolutionizing prototype development by enabling more complex prototypes without the need for manual assembly, enhancing both functionality and aesthetic appeal.
Conclusion
From all we’ve covered, it’s obvious that choosing the right methods and materials really comes down to what you need for your project, including your budget, the complexity of your design, and how you plan to use the finished product. Thinking about how your design will be manufactured right from the start can help smooth the path from prototype to production.
For anyone stepping into the world of plastic prototyping, keeping up with the latest technology is essential. Make sure to review your prototypes regularly. This helps ensure that each version better aligns with your goals and gets you closer to a product that’s not just good, but great. Remember, prototyping is more than just making a part; it’s about refining your design until it’s the best it can be.
All in all, finding the right manufacturing technology and material is critically important to the success of your plastic prototype. Our team at 3ERP is more than happy to help you find the right process for you, so contact us today to learn more about our rapid manufacturing services.